
Hanging your favorite art prints, family photographs, or watercolors behind glass is essential for protecting them from dust, humidity, and UV damage. However, when the sun sets and ambient room lights turn on, standard glass frames often become reflective mirrors. Harsh glare, milky white haze, and distracting hot spots can completely obscure delicate brushstrokes and deep shadows. Fortunately, you do not need a museum curator's budget or complex electrical rewiring to achieve flawless, glare-free illumination. By understanding beam geometry, proper fixture positioning, and true color rendering, you can effortlessly showcase your glass-protected gallery collection in its best light.
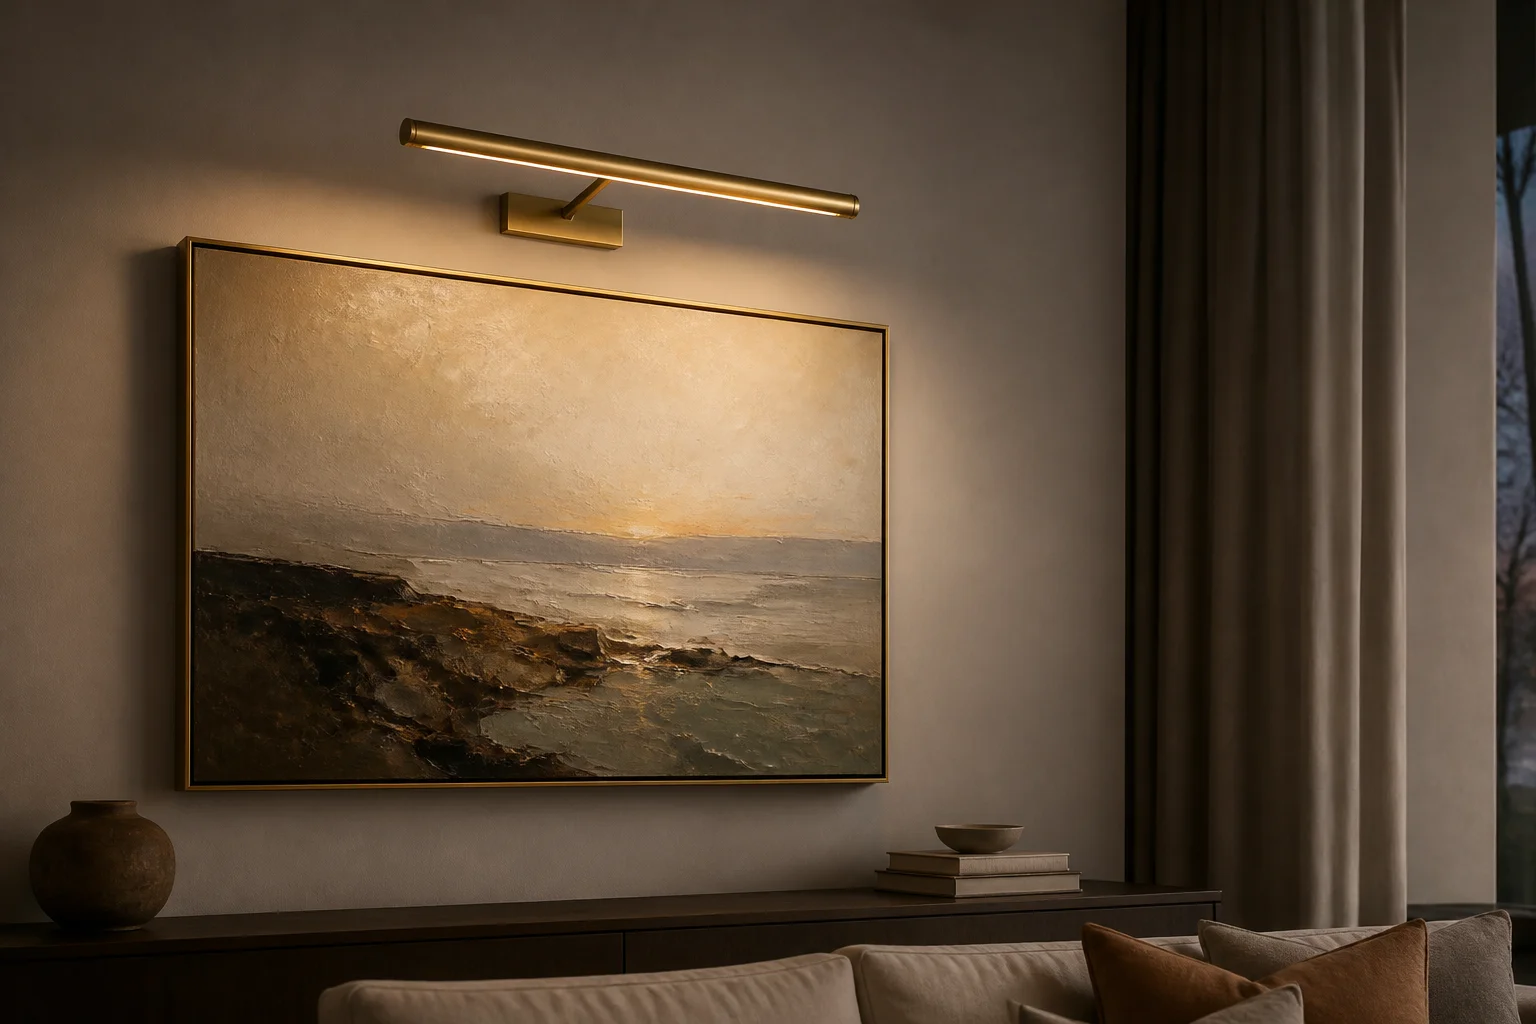
Understanding the Glare Triangle: Why Standard Lighting Fails Behind Glass
To eliminate glare on framed artwork, you first need to understand the physics of optical reflection. According to the law of reflection, light reflects off a smooth surface at the exact same angle at which it hits (angle of incidence equals angle of reflection). Standard picture framing glass reflects approximately 8% to 10% of ambient light. When ceiling downlights, chandeliers, or opposing table lamps cast light towards your artwork, that illumination bounces directly into viewer eye level—whether you are standing in a hallway or relaxing on the living room sofa.
The solution is not turning up the brightness of your overhead room lighting, which only washes out visual contrast. Instead, the secret lies in dedicated, top-mounted picture lighting that directs a controlled, downward beam across the face of the art so that any surface reflection bounces straight down toward the floor rather than into your line of sight.
Rule 1: Master the 30-Degree Angle Rule with Swivel Adjustability
In professional museum lighting, the golden standard for flat 2D artwork is the 30-degree rule. Mounting your light source so that its beam strikes the canvas at roughly a 30-degree angle from the vertical plane ensures even light distribution while completely routing specular reflections downward.
If the light angle is too steep (close to 0 degrees directly above the frame), the top edge of the frame will cast an unwanted shadow across the upper section of your art. Conversely, if the light fixture extends too far into the room (greater than 45 degrees), reflections will bounce directly back into seated viewers' eyes. Choosing a fixture with a rotating, adjustable cylinder head allows you to fine-tune the beam angle with millimeter precision, achieving a seamless wash across standard float glass, acrylic, and anti-glare glazing alike.
Rule 2: Prioritize High CRI (90+) to Penetrate Glass Without Color Washout
Glass and acrylic sheets naturally filter and attenuate subtle color wavelengths. When paired with cheap, low-quality LEDs, framed prints often take on a dull, greenish, or washed-out cast. To maintain the vibrant pigments and nuanced gradients intended by the artist, your picture light must feature a high Color Rendering Index.
Understanding what is CRI and why it matters is critical for art collectors. A rating of CRI 90+ ensures that every shade—from rich terracotta reds and deep navy blues to subtle skin tones—is accurately rendered through the glass barrier. High-CRI warm white LEDs (around 3000K) provide crisp optical clarity without producing the harsh blue glare typical of cool daylight bulbs.
Rule 3: Maintain Proper Sizing and Frame Projection
Scale and physical placement are just as vital as beam angles. Follow these three practical sizing rules for glass-framed pieces:
- Length Proportion: Your picture light bar should measure approximately 1/2 to 2/3 the total width of the picture frame. For a 24-inch wide framed print, a 12-to-16-inch light bar provides full coverage without visually overpowering the artwork.
- Vertical Clearance: Mount the fixture base plate 5 to 7 inches above the top edge of the frame. This distance allows the light cone to spread evenly before reaching the upper third of the image.
- Arm Projection: Ensure the mounting arm extends 3 to 5 inches outward from the wall. This depth clears thick gallery frames and decorative moldings, preventing top-edge shadow cutoffs.
Rule 4: Choose Cordless Wireless Convenience for Clean Aesthetics
Historically, achieving museum-quality art illumination meant hiring an electrician to run Romex wiring through drywall, patching plaster, and installing dedicated wall switches—a daunting and expensive project, especially for renters or historic homes. Modern cordless technology has revolutionized home art curation.
Today's premium wireless picture lights utilize high-capacity rechargeable lithium batteries and magnetic mounting systems. The slim light bar attaches securely to its wall plate with a snap and can be effortlessly detached for USB-C fast charging in seconds. For classic and transitional interiors, choosing a timeless brass picture light adds warm metallic sophistication above gilded or dark wood frames without a single trailing wire in sight.
Quick Troubleshooting: 3 Common Glass Reflection Mistakes to Avoid
- Placing the Light Too Close to the Glass: Mounting a fixture directly on top of the frame glass creates a blinding horizontal hot stripe. Always maintain at least 4 to 6 inches of vertical elevation.
- Using Cool Daylight Bulbs (5000K+): Cool white light amplifies the bluish surface reflection of glass. Stick with warm 2700K–3000K light for a welcoming, organic glow.
- Ignoring Ambient Room Balance: If an opposing window or television reflects directly into the glass, slightly tilting your picture frame 2 to 3 degrees forward from the bottom can direct those background reflections away while your dedicated picture light illuminates the subject.
By pairing the 30-degree beam geometry with high-CRI warm illumination and cordless mounting, you can transform your framed prints and photos into glowing focal points that command attention without distracting glare.